A motorised grain mill
By Nick Wiseman, Editor
Last year on a Thursday evening at the monthly meeting of the Canberra Brewers I was lucky enough to win in the raffles – a MillMaster MiniMill.
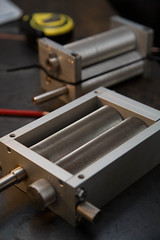
Although up until that point I had been (very successfully) using my modified Marga Mill and I had just purchased a second hand Crankenstein, I was excited about finally having a decent shiny mill at my disposal.
After winning the mill and immediately selling the Crankenstein to a fellow brewer who was also trying to win the MiniMill we were both offered the skills and time of, the club president at the time, Tom Dixon to make us a steel stand for them.
Despite that being in February last year, October 2012 finally saw the ongoing saga come to a close and a fully motorised brand new grain mill is now sitting proudly in the brewery.
Pete (the new owner of the Crankenstein), Tom and I got together on a Saturday and Tom quickly got us to work cutting and grinding all the pieces for the stand he devised based on our mills and motors.
I had already purchased a worm motor from Motion Dynamics who had been discussing requirements for brewers and their mills on AussieHomeBrewer in details for a while, I had seen others use motors and pulleys and even windscreen motors but I was happier purchasing something I knew was made for it.
After spending the day at Tom’s and a few beers later (not to mention the work involved) I walked away with a nice solid stand welded together by Tom himself.
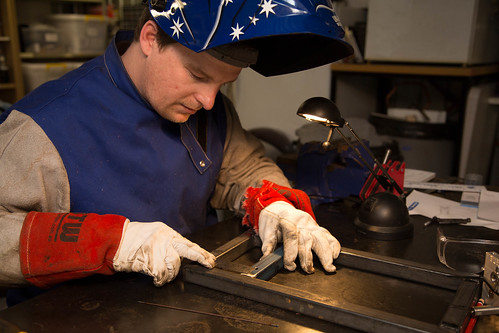 Tom preparing to weld it up
Bringing it home was only the start of the ordeal as I now had to wire up the motor to a power supply, speed controller and then finally to the mill.
I initially chose a PC PSU due to having one lying about in the garage but after modifying it to suit I discovered it was dead and needed to find another solution – this solution ended up being a 12 volt, 29 amp PC server PSU from eBay (something like this).
 Once the power supply arrived I chose an outdoor electrical power board enclosure which was the right width for the stand, this would keep the PSU and controller board safely out of reach and also out of the potential grain dust from the mill.
After sizing it all up, I cut out all the holes needed, rigged up some mounts to attach it to the stand and then gave the enclosure and stand a nice coat of paint.
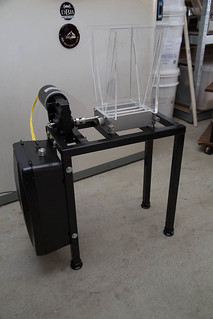
Once the paint dried it was time to put it all together and do the final wiring before sitting back and admiring the new grain mill.
A few moments later I measured out a kilo of grain for the final test and put it into the hopper and switched on the mill to hear it fire up and purr along milling much faster than the Marga ever did.
The final list of items and equipment ended up blowing out after I purchased a Dremel as well, being something often talked about I decided to go and grab one – how did I live without it before!
Apart from that budget blower and the steel, mill, and motor it was pretty much some wiring, screws and connectors as well as the enclosure. I had a lot of items lying around from previous projects so it all worked out pretty well.
The final job was to modify the hopper as the official one I bought was way to small, my solution was to use a 12L water container from a water dispenser (Neverfail type) and fit that to a custom made lid from scrap wood I had lying around. This fits on top of the exisiting hopper allowing almost a full double batch of grain to be fed through – after this its simply turn on and walk away!
Due to the differences in shaft size between the mill and the motor (12mm and 12.7mm) I originally chose a small Jaycar Spider coupler which I drilled out to suit – it doesn’t look like they have them on their site any more but it looks like this. I’ve since found these little pre-drilled ones on eBay – I have yet to connect it up but it’s waiting until sometime when I do.
That’s pretty much about it, the rest of the electronics were all tidied up with heatshrink wrapping and zip ties, and the mill works very nicely!
Original post can be found on my personal blog here which also contain some up to date notes and answers to questions that have been asked.
Check out the photos here on Flickr and the video is also available on YouTube.
Leave a Reply